
Since I've explained the basic process for this series in other posts, I'll keep things a bit simpler this time. Below are lots of sketches...for some reason, many more were needed to figure out the final shape of the "Aero-Bike".

These are all of the bits of "found objects" and wood pieces I crafted for the machine.

Now I start assembling the parts...I had to patch the landing gear with epoxy putty. As before, I coat everything with glue to give a bit of texture and seal up gaps.

Here's the "Aero-Bike" all put together, then painted with a base coat of brown acrylic.

Now, the final paint job.

Here's my desk in the studio, as I'm making the base for the piece.

I began to add more and more detail to the "swirling clouds". I probably made the base a bit too elaborate this time around...oh well.

I finished off the metal support wire with epoxy to give it a bit more strength than Sculpy would afford. You'll see in the inset image that I added another little "swirl" to support the tailpiece...I was afraid that the added weight of the Mandrill monkey would pull the "Aero-Bike" apart from the base.

All painted, but not glued together yet.

Next time...how I made the Mandrill pilot.
-W


 Before sculpting the Mandrill, I sketched a "to size" drawing to figure out the scale of the monkey. Then I roughed up a loose sculpt to get the proportions of my armature right. Later, I removed the head section of the armature, when the scale of things changed during later stages.


 That's it for this series. On to something new!
 Since I've explained the basic process for this series in other posts, I'll keep things a bit simpler this time. Below are lots of sketches...for some reason, many more were needed to figure out the final shape of the "Aero-Bike".


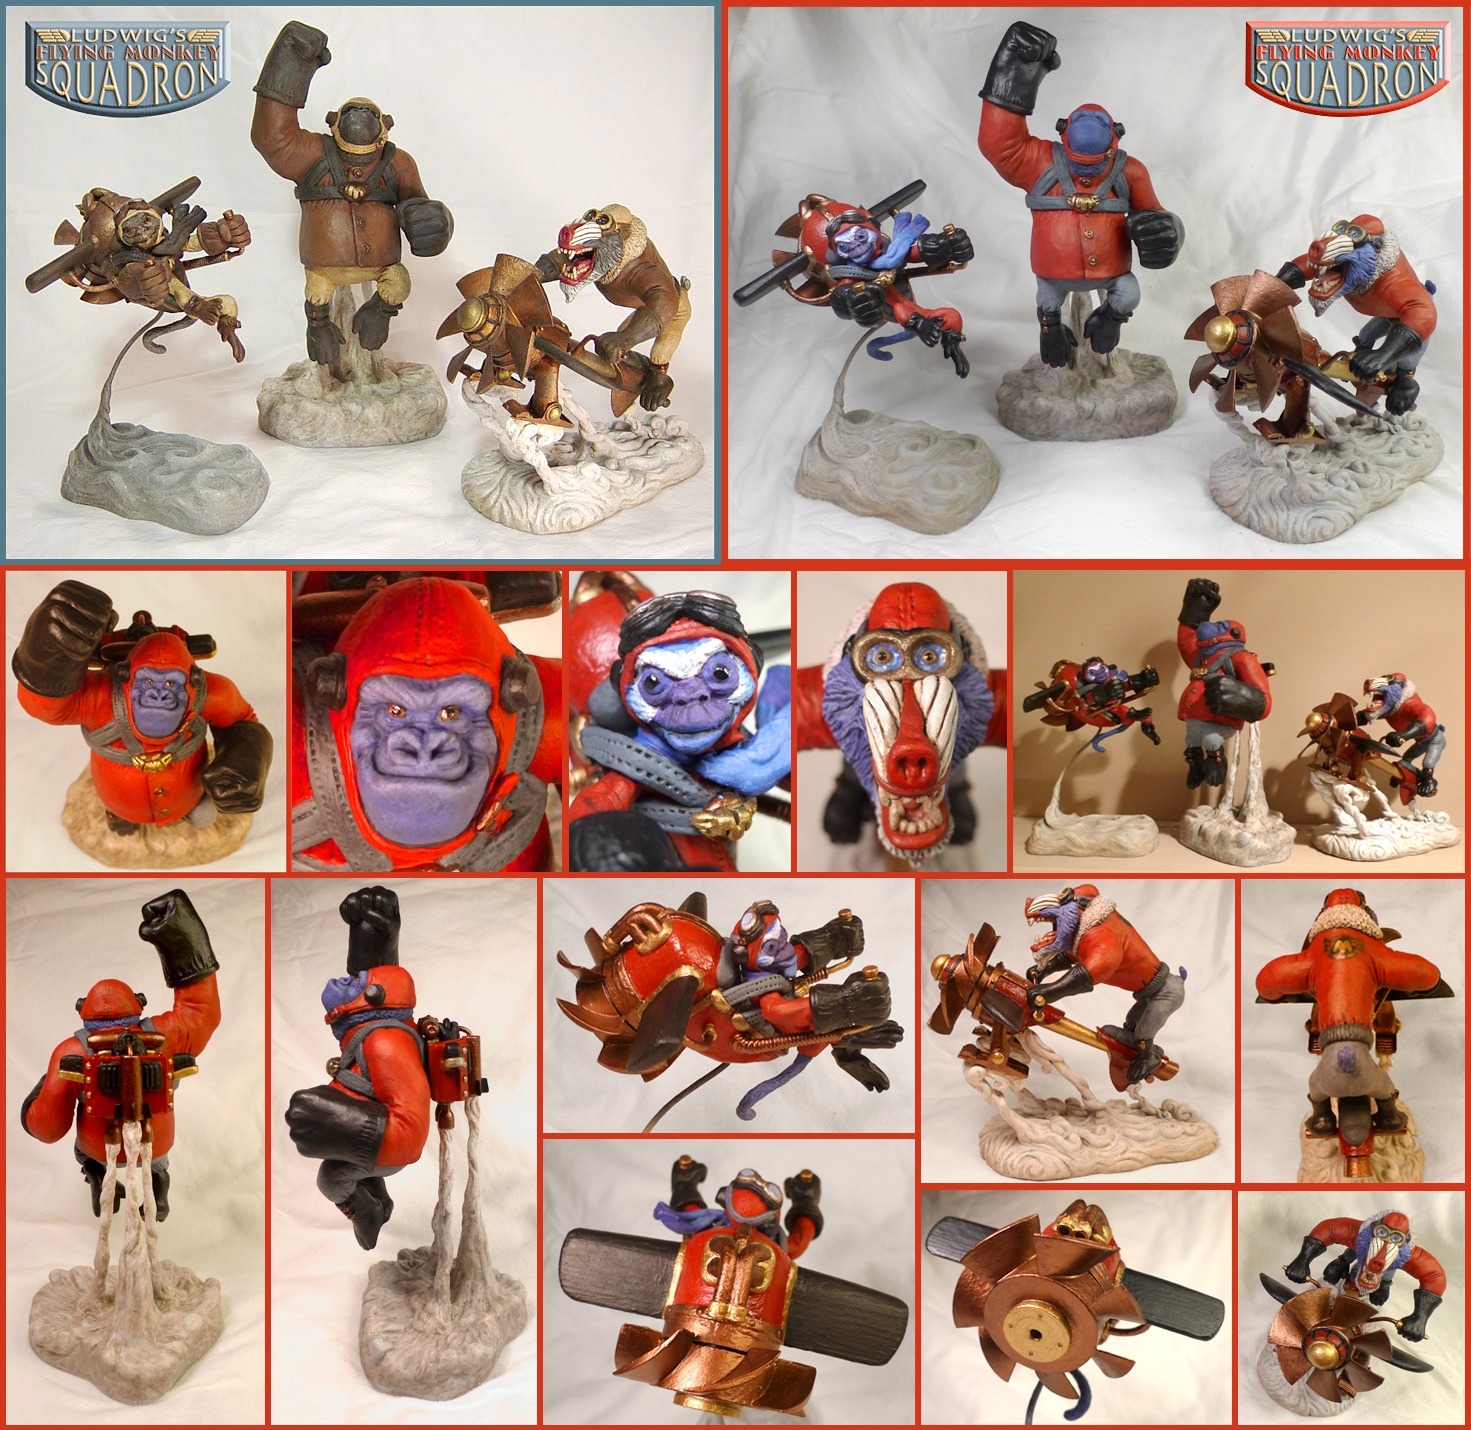
 NEW! The third member of the "Flying Monkey Squadron" is finally finished...meet my "MANDRILL on an AERO-BIKE"!

 Here is the completed sculpture, all put together! Hope you like it.


 It became obvious that my proportions were off for the length of the overhead arm. I added a good bit more clay and modified the pose. I then sculpted the final details of the jacket and added the jet-pack straps.


