I just finished the latest addition to my series of "Kaiju Monster Heads". This one is a GIANT BULL ELK. His special powers are Lightning Antlers that deliver an Electro-Magnetic-Pulse, as well as an Ultra-Sonic-Boom caused by his ear-piercing vocalizations. I was inspired by the movie "Kong: Skull Island", and the gigantic mutant water buffalo featured there.
Showing posts with label Sculpture-Monster Heads. Show all posts
Sunday, June 9, 2024
Tuesday, December 19, 2023
SCULPTURE: "Kaiju Monster Head #7"
With all of the Godzilla /"Monsterverse" movies and series out there, I felt it was way past time for me to sculpt a new "Kaiju" monster head. This one is a gigantic "Carnivorous Triceratops" kind-of-thing with triple boney battle-crests.
Sunday, April 30, 2023
SCULPTURE: "Monster Head #6"
Here's
the newest addition to my "Kaiju Kollection" that I have sculpted over
the last few years. I have loved giant monster movies all of my life.
While I really enjoy the more serious/realistic depictions of Godzilla
(created with modern computer effects), there is also a deep
appreciation of the sillier side of Monster Mayhem. "Ultraman" movies
and TV series offer some of the best of the ridiculous. Here is my
little tribute to that genre.
Thursday, April 26, 2018
SCULPTURE: Monster Head Pt. 5
It's been a while since I've played with some Sculpy clay. I got
inspired by some of the recent movies with giant monsters in them
("Rampage" and "Pacific Rim 2"). It was time to return to my series of
sculpts featuring "Kaiju" (giant monster) heads. For your viewing
pleasure...an ICE DRAGON!
I began with a core of aluminum foil and wire. The wire is set into some holes drilled into the wooden base. I originally thought I would add some bits of dragon wings to the base, but decided not to.
I kept the head as a separate element, so I could sculpt the finer details. Little by little, I added more horns and skin textures. I also worked down the front of the neck with some horned armor.
You will see below left that I started adding armor plating to the sides and back of the neck. But I just didn't like how it was going, so I scraped it all off and started over.
As usual, I painted the whole sculpture in a unifying base coat. Since this was to be an ice dragon, I wanted the colors to be a variety of "cold" colors. I gave the mid-tone blue a watered-down acrylic wash of a darker blue. When that dried, I dry-brushed several layers of aqua, green, blue and purple.
Below is the finished paint job.
My new Ice Dragon fits nicely on the shelf with my other "Kaiju" monster heads. I'm sure I'll add some more to the family.
Sunday, February 23, 2014
SCULPTURE: Monster Heads! Pt.4
Run for the Ozark Hills...KING HOG ATTACKS!
Hard to believe it...but I started this project officially TWO years ago! I had ideas of making a sculpture of an epic battle between two Giant Monsters: "KING HOG vs BULLZILLA" (Click the link to see the backstory.) But it took seeing the movie "Pacific Rim" last year to get the ball rolling. Granted, I may never do the full sculpt, but at least I've got a fun Monster Head series going now. And I love making the "mini posters" of the creatures in action!
For any fan of the ARKANSAS RAZORBACKS, you'll see the inspiration for this creature. For those who have followed my blog, you'll be familiar with the general process I use.For the other three monsters in this series, I did not create any sketches beforehand...I just let myself be surprised where things would end up. But when I was having a new clutch put into my car a few months ago, I just figured I'd use the time to kick around some drawings of how KING HOG might look. I wanted to exaggerate the tusks, and give him some "razor sharp" spikes on his back.
The project started with a wooden base and a nail to secure the foil that forms the core. I often do a loose sculpt to get general proportions in place. This will be totally replaced bit by bit with more refined elements. You'll note the ball of foil with a dowel in it. This was going to be the head, and I could rotate it for the best angle for "dramatic effect". I decided not to use it with the rough sculpt. But later changed my mind and redesigned the whole thing WITH the head as a separate piece.
Here are the various tusks and teeth that I baked separately. The gray color is from "Sculpy Firm", mixed with the pink "Super Sculpy" for better detail. I then built a set of jaws with the teeth in place, and baked it again, so I would not keep messing them up with the rest of the sculpting process.
I worked from the snout to the back, adding details and fleshing out the forms. As with the teeth, I made the spines separately, and baked them before putting them in place.
In the course of handling the sculpture, I found that the base had some cracks developing where I had quickly sculpted some rocks. So I had to redo that area with a few simple shapes of clay. Then I added a mixture of sand, small gravel and glue, to give the base some texture.
Here is the final sculpted piece before painting it.
Now comes the paint job...I always enjoy this phase of the project...it's the icing on the cake! I started everything with a base coat of RED acrylic, since that is the proper color for any self-respecting razorback. I then added a very thin wash of black, to pop the detail. After that, its just a matter of adding multiple layers of dry-brushing and glazing until I am happy with the results.
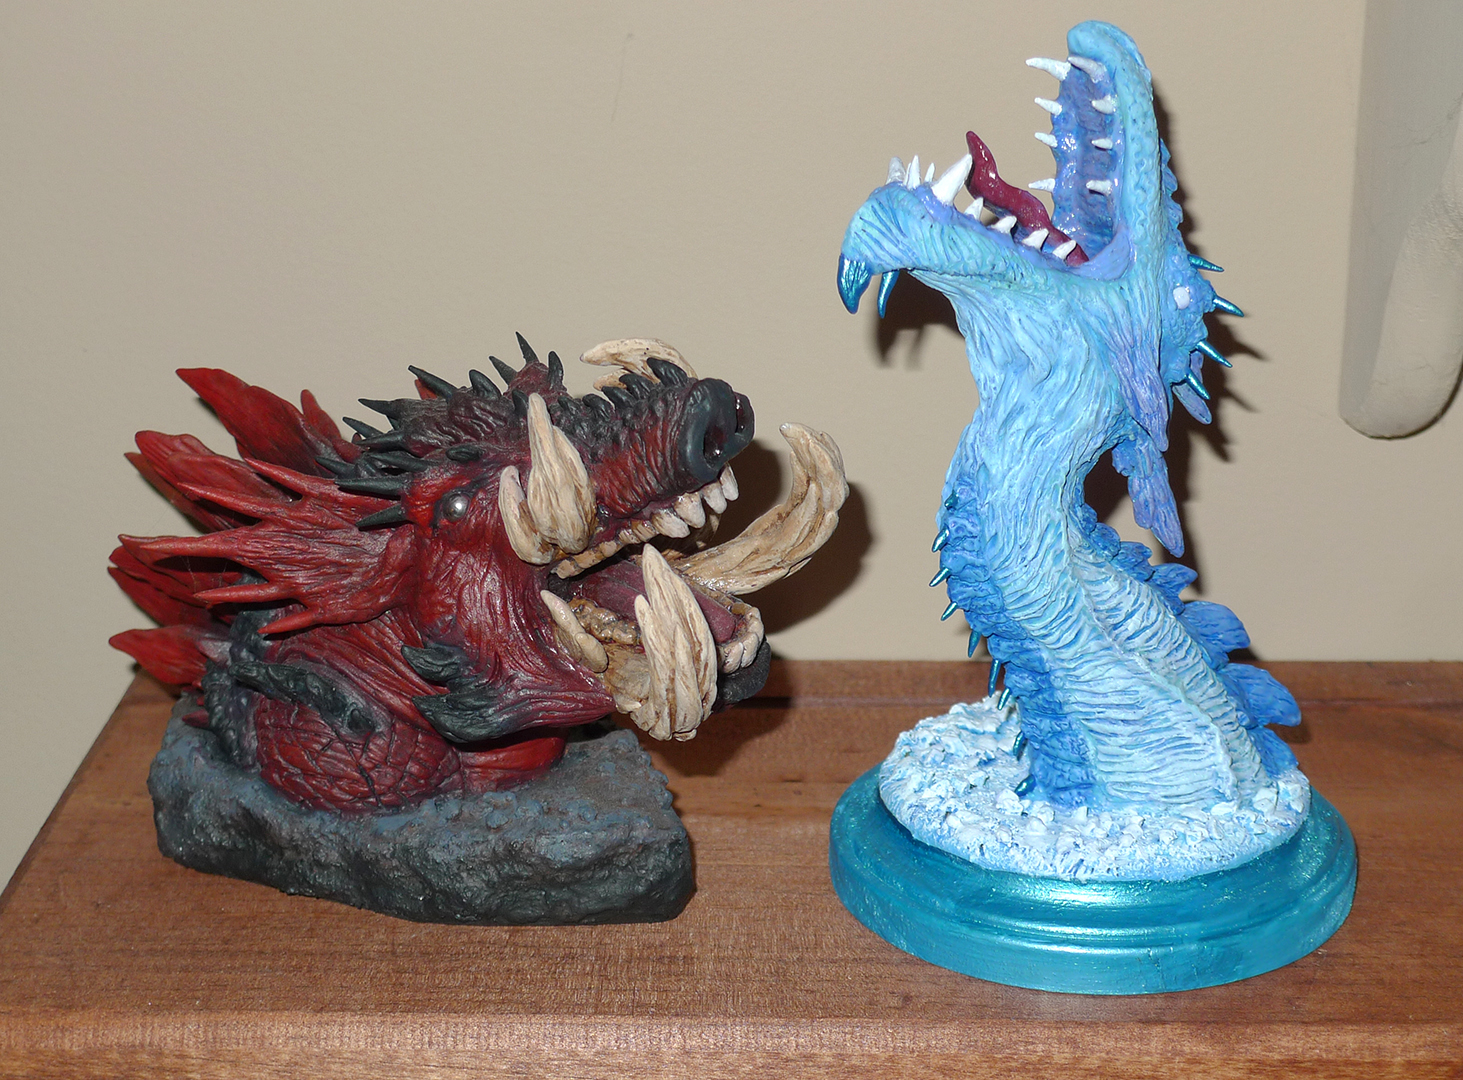
This is the finished color for KING HOG...
Here is the current lineup of my KAIJU MONSTER HEADS. I'm sure there are more to come!
Monday, September 30, 2013
SCULPTURE - Monster Heads! Pt.3
BEHOLD...THE TERROR OF BULLZILLA!
Here is the third entry in my ongoing series of Monster Heads. These have really been fun to work on! This particular design actually started over a year and a half ago. I had been kicking around the idea of a full-on fight scene inspired by two rivals from the world of college football. You can read about that original post here: "King Hog vs. Bullzilla!" However...I may never get around to finishing that sculpture. So in the mean time, I thought I'd see if I could get inspired with just doing the head of one of those monsters.
As usual, I start with a wood base, with a nail wrapped with wire. This time I did not use a pre-made piece from the hobby shop. I thought I'd try a base that looked like boulders. I added aluminum foil as the core of my armature. Once I gave it a "skin" of Sculpy, I baked the basic shape with a heat gun.
Next came the teeth, which I sculpted and baked. I didn't want to keep bumping the teeth in the process of sculpting, and had already decided to have the mouth closed.
I began to play around with various profiles. I had intended on making this creature look more like a mutated BULL (a Texas Longhorn to be specific). However, it started to feel too much like the "minotaur" from ancient Greek mythology. So, I decided not to lock in to being so literal with the details of a real bull, and just let my imagination run free.
Here are a few pics of the development of the back of the neck. It just sort of grew into more of a spine, with the bones showing at the surface. I roughly blended the forms, leaving the linear texture...then smoothed it out by painting on oderless paint thinner.
After adding the basic shapes of the face, I continued the process of smoothing things with the thinner. But I tried to keep the wrinkles showing. After I was basically done with the face, I thought it would be nice to add some battle scars! Then I finished out the details on the horns.
The next images show the rock and sand mixture that I put on the base of the creature. I'm not sure I'm so happy with how it turned out. I would have done better to just use sand on the sculpted rock base...the bigger gravel bits obscured most of the details of the form. Oh well...live and learn!
The paint job came next. That is one of my favorite parts of these projects. I had decided to try to keep with a burnt orange color palette, to match with the Texas Longhorn school colors. However, in the end, the paintjob wasn't quite true to those brighter colors.
Here are a few "turn-around" shots of the final sculpture!
I will continue to add more to this growing little family...probably the next one will be a version of "King Hog" inspired by the Arkansas Razorback!
Subscribe to:
Posts (Atom)