I had fun over the last few days drawing some aliens, robots and monsters for my friend Jaye Wiley. He's working on a project and needed some quick illustrations...whatever I wanted to come up with that would fit the "space" theme. It was a good exercise...it's been too long since I've done this kind of stuff!
It has been almost three months since my last post. I have been busy with various other projects. But I could not resist finishing out my studio wall with another paper mache "monstrosity". The movie "CREATURE FROM THE BLACK LAGOON" came out the year I was born in 1957. It was one of my favorite monsters growing up, and I'd watch it any time it was showing on TV.
If you have looked at the other two paper mache projects that I've posted on my blog, you will be familiar with the process. I start off gathering a lot of research images, to both inspire me, and to help me with details. I decided I needed to pose as the Creature, to figure out the perspective and proportions. Then I worked up a little composite sketch from all the research I'd found, to match the photo of myself.
I had found a larger circular piece of wood at the hardware store and began to make my armature out of PVC pipes. I was able to bend the shape of the pipes with a heat gun, to get just the right angles I wanted. I began making the Creature's hand from heavy gauge wire. I used newspaper as filler, and began covering the shapes with masking tape.
Next I began to fill out the basic forms with more newspaper and tape. I decided it would be much easier to sculpt everything, if I kept the base and face, the arm, and the hand in separate pieces for as long as possible. I then added some mulched mache to the shoulder area, and to the forearm, to add support when dried.
The hand was my favorite part to work on. I used the same method as before, filling in the bulk with newspaper and wrapping it all with masking tape. I used wire to form the outer edges of the webbing between the fingers. Then smaller strips of tape were used to fill in the open spaces and create a membrane to add mache to.
Once I had my basic forms built, I began to add paper mache mulch to build up the stucture. When dry after a couple of days, the mache is hard as a rock.
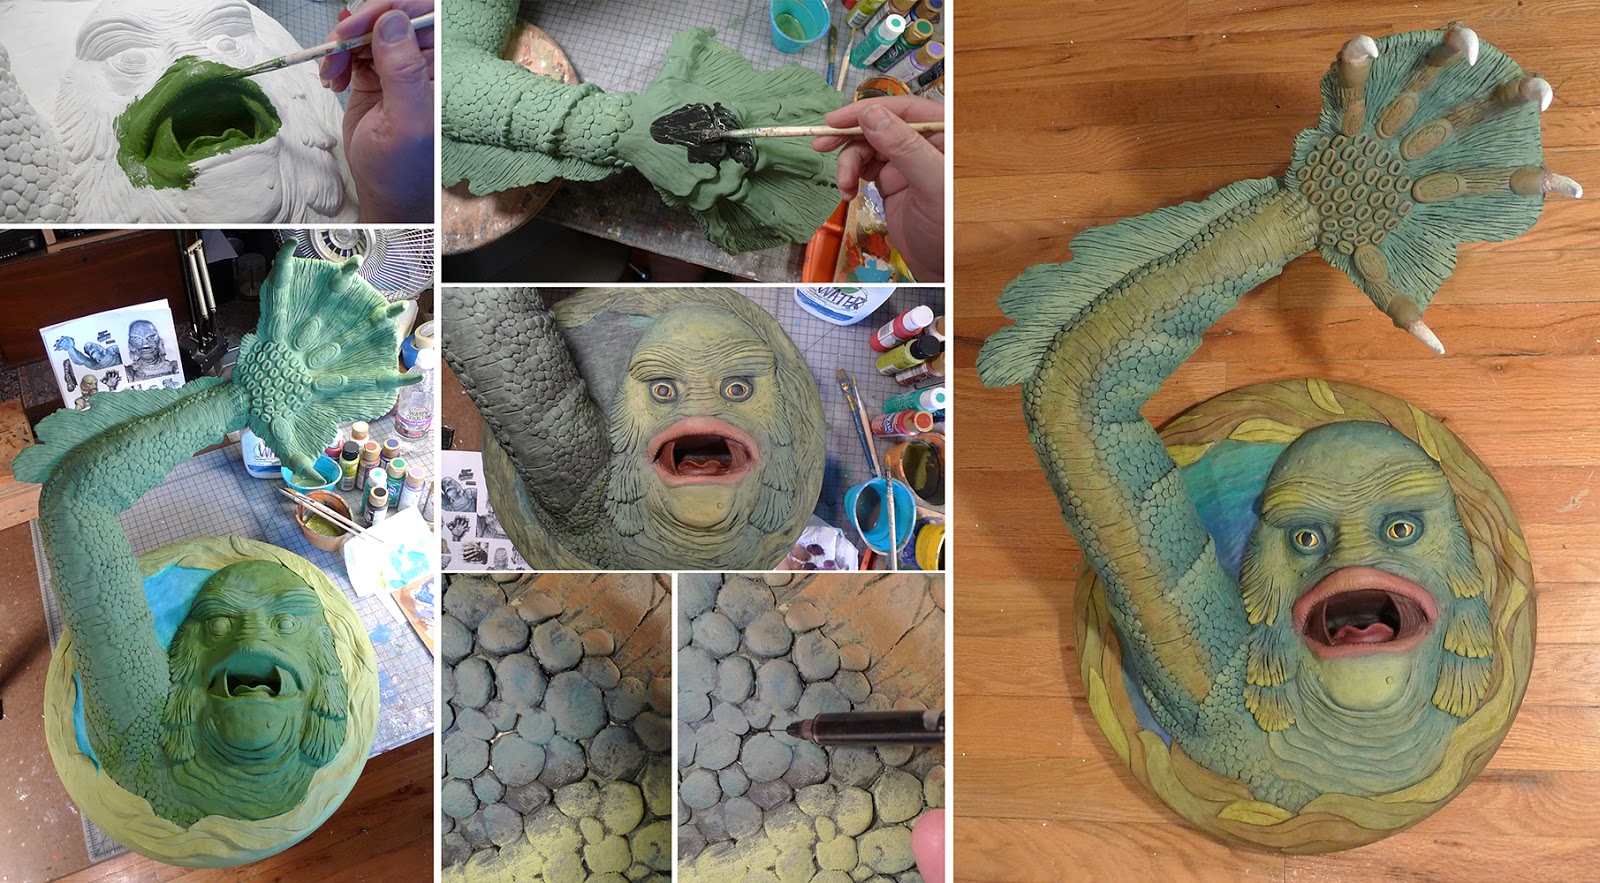
Below are the labor intensive steps to add details to the hands. I used "paper clay" on top of the hardened "mulch mache". The clay is smoother, and easier to sculpt with. It's a little pricey for the amount you get...about $10 for a pound. I think I used perhaps 4 or 5 pounds of the paper clay. I'm guessing that the total price for supplies might have been around $100.
Next, I move on to the face. The eyes are made from two wooden balls I found at a hobby store. I began to build up details in stages. The paper clay shrinks as it dries, so there was a lot of time spent filling in spaces and cracks.
I then sculpted some "seaweed" for the border around the edge of the circle. I used the wet mulch and a spoon to make some basic shapes...almost like icing a cake. Once that was dry, I then used the paper clay to form the shapes of the individual leaves weaving in and out of each other.
The next phase was to attach the arm to the base, and continue with adding details. I think I made a couple of thousand little balls of paper clay to create the bumpy skin texture. That took a couple of days to cover everything. I eventually attached the hand to the arm and filled in the wrist area. Before adding the mulch as support around the wrist and shoulder, I used the PVC glue to hold the armature together.
Below is the final sculpture hanging on my studio wall. Next stop...the paint job!
Painting is probably my favorite part of these projects. As usual, I used acrylic paints, and built up colors with glazes of very wet washes, and also thicker dry brush techniques. I can use color and various values to enhance the sculptural forms. In the lower middle of the photos below, you can see that I had some little patches of white between the bumps. I used a syringe filled with black ink to squirt into the gaps.
Once I had everything painted to my liking, I coated the whole thing with a high gloss acrylic varnish. The details of the paint looked better before adding the varnish, but I wanted a "wet look" since the Creature is coming up out of the water.
Here is "Mr. Gillman" all finished and hanging on my studio wall!
This is how my triad of the "Terrors of the Deep" look all together!