Sunday, January 29, 2012

Odd Creatures

I was recently invited to contribute to a new blog called
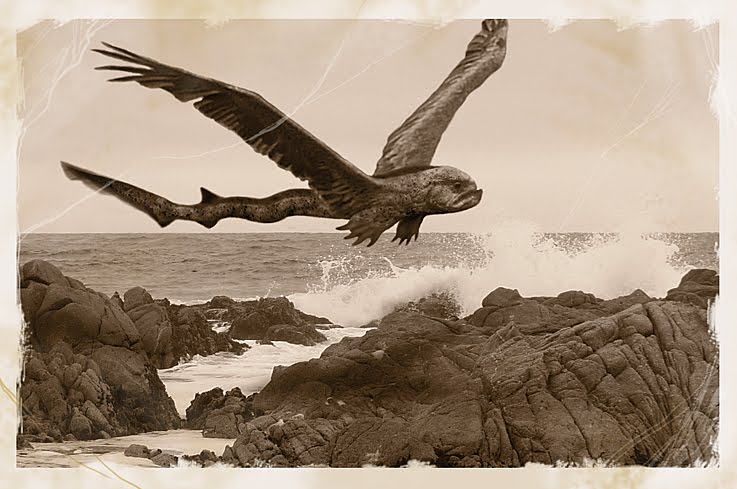
"Professor J. Fenious Peak's Fantastical Menagerie of Verification Creatures". The site has been up and running for about a week. The idea is to create sketches and illustrations inspired by the unusual "verification words" you see when you sign in to websites or leave a comment on someone's blog.

The big mosquito above is called a MORPEST. If you want to read all the stats on these and other oddities, go visit the site:

Below is an ALIKESOR...

...a few SHILEADI...

...and a VAIRKIN.

Friday, January 20, 2012

SCULPTURE - "Santa vs. The Yeti" FINAL

BEHOLD...The SMACK-DOWN in TOY-TOWN!

Santa didn't start this fight, but he sure as fruitcake is gonna end it! Ain't no giant Yeti gonna be munching on Kris Kringle's workforce and get away with it! Some heard him exclaim, as he drove the beast out of sight..."I know when you are sleeping...I know when you're awake..."

Okay...enough silliness. Here are photos of the last few stages of the sculpting process...pretty much the same techniques that I've shown all along. I added smaller pieces of sculpy to build the general shapes and flow of the Yeti's fur. Then I spent a good deal of time adding detail with various sculpting tools.

Once all the fur was done, I glazed the whole piece with oder-less solvent. Then I let it sit overnight, to set up after "melting" the sculpy to a smoother surface. I covered the bottom of a pie pan with a piece of aluminum foil, and placed the sculpture in the center of it. I baked the Yeti in the oven at about 250 degrees, for 30 minutes. After I turned off the heat, I opened the oven door, and just let it cool down slowly.

Next, I painted a gray-blue base-coat with acrylics, then several layers of glazes, building up from the darker values to the lightest...dry brushing and blending until I was satisfied with the results.

While waiting for the Yeti to bake, I started painting Santa...first a base coat of brown, then the colors I wanted. I then used very thin washes of tans, black, and various blues to add depth and variety to the paint job.

After all the painting was finished, I used super-glue GEL to fix Santa onto the back of the Yeti. I had left a hole in the Yeti's shoulder for the armature wire that protruded from Santa's foot. I had also sculpted a "foot hole" in the Yeti's back. Once the glue had set-up, I sculpted a little piece of "fur" out of plumbers epoxy to look like Santa's hand was holding on the the beard hair of the Yeti. A bit of touch-up paint to match the Yeti fur...and it's all finished!!

Here are various views of the final "Santa vs. The Yeti" sculpture. Hope you enjoyed watching the process!

Saturday, December 31, 2011

SCULPTURE - "Santa vs. The Yeti" pt. 4

"Here comes Santa Claus, Here comes Santa Claus..." This is my final post for 2011! Hard to believe the year will be over in a few hours. Glad I was able to finish this phase of the sculpt just in the "St. Nick" of time! (I know...I'm groaning too.)

Let's walk ya through the process...I'm sure it's starting to get a bit repetitious. As before, I made a wire armature to get the size and pose where I wanted it. I made Santa a bit larger in scale than the original rough-in.

I made the hammer out of a nail, and plumbers epoxy. Then I covered them with the sculpy, and baked it.

I was trying something new this time around. Many sculptors that I follow online use a heat gun for "locking in" certain areas of a sculpt, while keeping other areas soft, to continue sculpting. I have much to learn about technique...as you will see, I scorched a lot of the rest of the sculpture. I just didn't want to wait on using my little toaster, as the heat gun is a faster way to bake stuff. I used plumbers epoxy to connect the hammer to the arm...then just started building up details.

Santa's face was a little tricky, since the size of it was so small. I'm not super patient with the tiny details, so it isn't as refined as I'd like. After I had baked the face, I added some beard bits on top. It's all shiny, because I glazed it with solvent, to blend the surface some.

Once I attached the head, I just kept going with more detailing. As I've said before, I was going for a "barbarian" style Santa. After the final baking, the features were so scorched by the heat gun, that I couldn't see much of what I'd sculpted! So...I painted on a quick coat of acrylic, and it's good to go. (I will not be baking it any more, so the next stage for this guy will be the final paint job.) I'm currently re-reading "The Hobbit", so it may be why Santa looks a bit like a battling DWARF!

I'm on the home stretch now. Next will be addition of Yeti Fur, and an ice-covered base. After that...the final painted piece!
"See ya NEXT YEAR!" Happy 2012!