Yesterday, I finished my latest project...a paper mache GIANT SQUID. As usual, this took way more time than I anticipated, but I'm pleased with the results, so it was worth it. Paper mache is not my favorite medium to work with, due to long drying times. But it was right for this particular sculpture...it's fairly light and structurally strong.
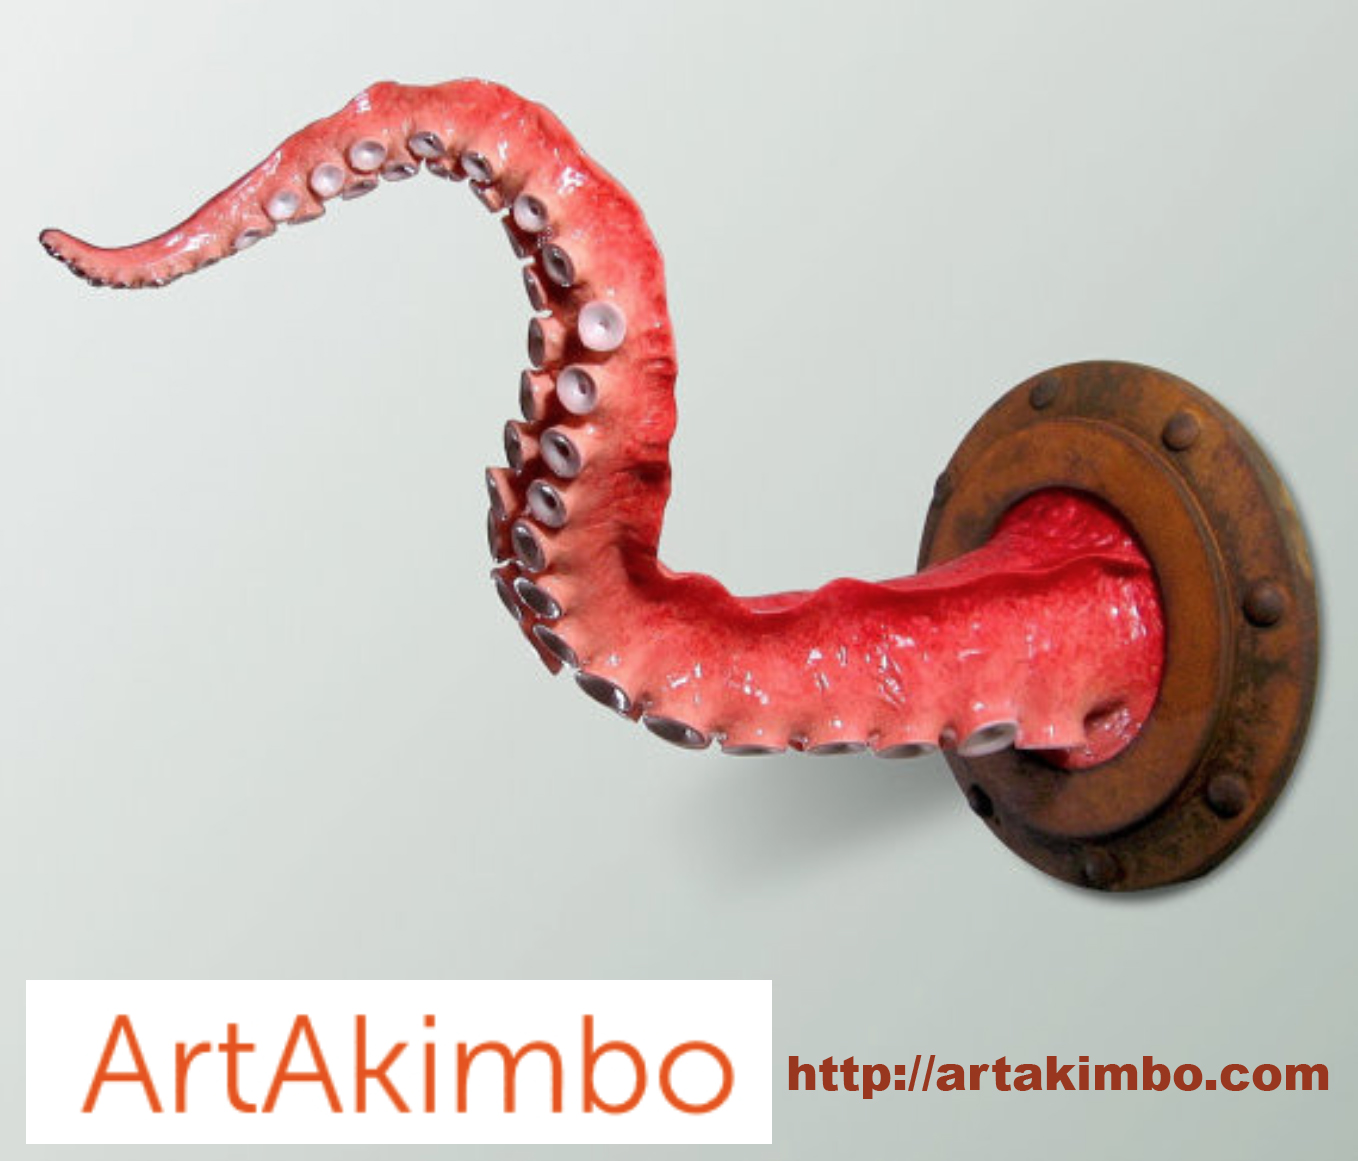
I want to start off by giving credit where credit is due for the inspiration for my sculpture. Last year, I had come across the image below of an octopus tentacle sold at ArtAkimbo.com online.
I decided that I wanted to make my own version for my studio wall. Since it would hang by the door, I wanted to have the tentacle spiral down more, so that folks wouldn't bump into it. I also wanted to make a big eyeball staring in through the porthole, and have two tentacles, instead of just one. It's also greatly influenced by childhood memories of the monster squid in Disney's "20,000 Leagues Under The Sea".
I won't go into lavish detail about every step, but will try to give you enough information to see how this piece came to be. I had picked up some wooden "plates" at Michael's Hobby store. I also bought some wooden buttons for the "rivets" and a piece of plexiglass for the porthole window. I had a piece of pressed-wood particle board that I used as the backing, I traced around the largest "plate" and I cut a hole out to put the wire for hanging this sculpture. I cut out the center of both pieces of my porthole, and drilled holes to glue the rivets in place

After making a "hinge" with a couple of wooden dowels, I glued the porthole together. I made an anchor for one of the tentacles out of a large dowel, and drilled holes in it to hold some heavy gauge wire. I formed the basic shape of the long, thinner "arm" that would be pushing the porthole open. Then I used wood screws to connect three more pieces of wire that would be the starting point for the larger tentacle. You can see some of the research on my desk of what a squid looks like.
I took the porthole upstairs to my studio and hung it securely on a screw in a stud in the wall. I took some white tissue paper and began wrapping it around the smaller "arm". I used masking tape to sculpt the form. I then continued the same process for the larger tentacle's base. Once I had a good shape coming out of the porthole, I taped on three very long wires. I then began to form the curves of the larger tentacle.
I repeated the same technique as before, using tissue paper as my "core" for building up the shape of the tentacle. I preferred using tissue paper instead of newspaper, because it was lighter. Once I had the basic armature done with the masking tape, I returned to my basement with the piece, and began to add some layers of good old paper mache. I used strips of newspaper, and a "glue" of water and flour. Once I was done, I let the paper strips dry for several days.
I switched to a different kind of paper mache made from "mulched" paper with a powdered binder. When water is added, it becomes the consistency of oatmeal. I began to build up the forms of the squid with this material. It dries fairly rough, but can be sanded later. The white "eyeball" is made from a styrofoam ball cut in half.
When the mulch mache was good and dry, I began the smoother detailing using yet another type of "paper clay" found at the hobby store. This material feels very much like regular clay, and can be smoothed with a brush and water. It took days and days of adding all the little "suckers" to the tentacles...the least enjoyable part of this project.
I continue using the "paper clay" to add details to the face of the squid, and to cover all of the surfaces of the tentacles to get a smoother finish. One thing I discovered was that the mache will shrink when drying. I had to repair a lot of cracks and gaps that formed with little bits of the paper clay.
Here is the final sculpture before I painted it! I had to do a lot of sanding of the surface, to get a smoother skin on the tentacles. But the paper clay sands easily without a lot of pressure needed.
The last stage of this project is my favorite part...adding the paint! I began with a base of red acrylic. Then I built up layers of lighter tones, and "dry-brushed" the colors to get more of a blend in the transitions. I would go back and forth with colors...lighter on the high surfaces, glazes of darker colors for the valleys...then repeat. I also would glaze with various hues...purples for the shadows, oranges and pinks for the lighter areas. I gave the whole sculpture a thin wash of very watered-down orange, just to unify it.
Here are some shots of how I detailed the eyeball. I ended up making the darkest part of the iris a bit smaller than originally painted...just thought it made the eye have more emotion.
After I finished painting the squid colors, I finished off the porthole. I gave it a base coat of metallic bronze, then "weathered" it with glazes and dry-brushed aqua and black. Then I screwed on the plastic window on the back of the porthole. The window doesn't show up very well, but I didn't want to leave it as just a wooden circle.
The final touch was to give the squid a nice "slime coat" of high-gloss acrylic varnish. The results made me smile...just the effect I wanted!!
And here is the final finished piece welcoming visitors to my studio!!